Chapter 3 Git
3.1 Introduction
In this first chapter, you will familiarize yourself with one of the important aspects of a data pipeline: Git.
Think of git as a way to keep track of the different versions of a document. But it is also an important tool to collaborate on a project. It is eventually a nice way to always have a backup of your work. It is particularly important in this day and age.
Remember, the goal of this book is to harness the power of data science tools for business. In this regard, we promote reproducible research as our research method. In order to do so, RStudio, with documents written in Markdown, will be your main portal for doing your projects. You will learn a few syntax tips regarding Markdown and how to save your projects online (Git). Throughout the chapters, useful tips will be either displayed in bold or in italics.
At the end of the chapter, you should be able to:
- understand the power of git;
- use github
- use the lower camel case
- pull, commit, push
3.2 Github
In this section, we present how to save your project in the RStudio console. Previously, we mentioned the blue floppy disk button located in the top left-hand panel. This button will only save your project locally, meaning that only you will be able to save and access the file. However, your project must be synchronized in an online server called Git (located in the top right-hand panel).
We will use here a commercial platform called Github. You are required to create an account on github. But you could also use open source-based solutions like Gitlab, etc.
3.2.1 Create a GitHub account
Create an account on https://github.com, it’s free!
Or, if you already have one, go to the next step.
3.2.2 Create a GitHub repository
Make sure you are logged in on GitHub.
Click on the green “New repository” button. Or, if you are on your own profile page, click on “Repositories”, then click on the green “New” button.
How to fill this in:
- Repository name: myrepo (or whatever you wish, we’ll delete this soon anyway).
- Description: “testing my setup” (or whatever, but some text is good for the README).
- Public.
- YES Initialize this repository with a README.
- For everything else, just accept the default.
Click on the green button “Create repository.”
Copy the HTTPS clone URL to your clipboard via the green “Clone or Download” button.
3.2.3 Connect GitHub on RStudio Cloud
In RStudio Cloud, start a new project from Git Repository :
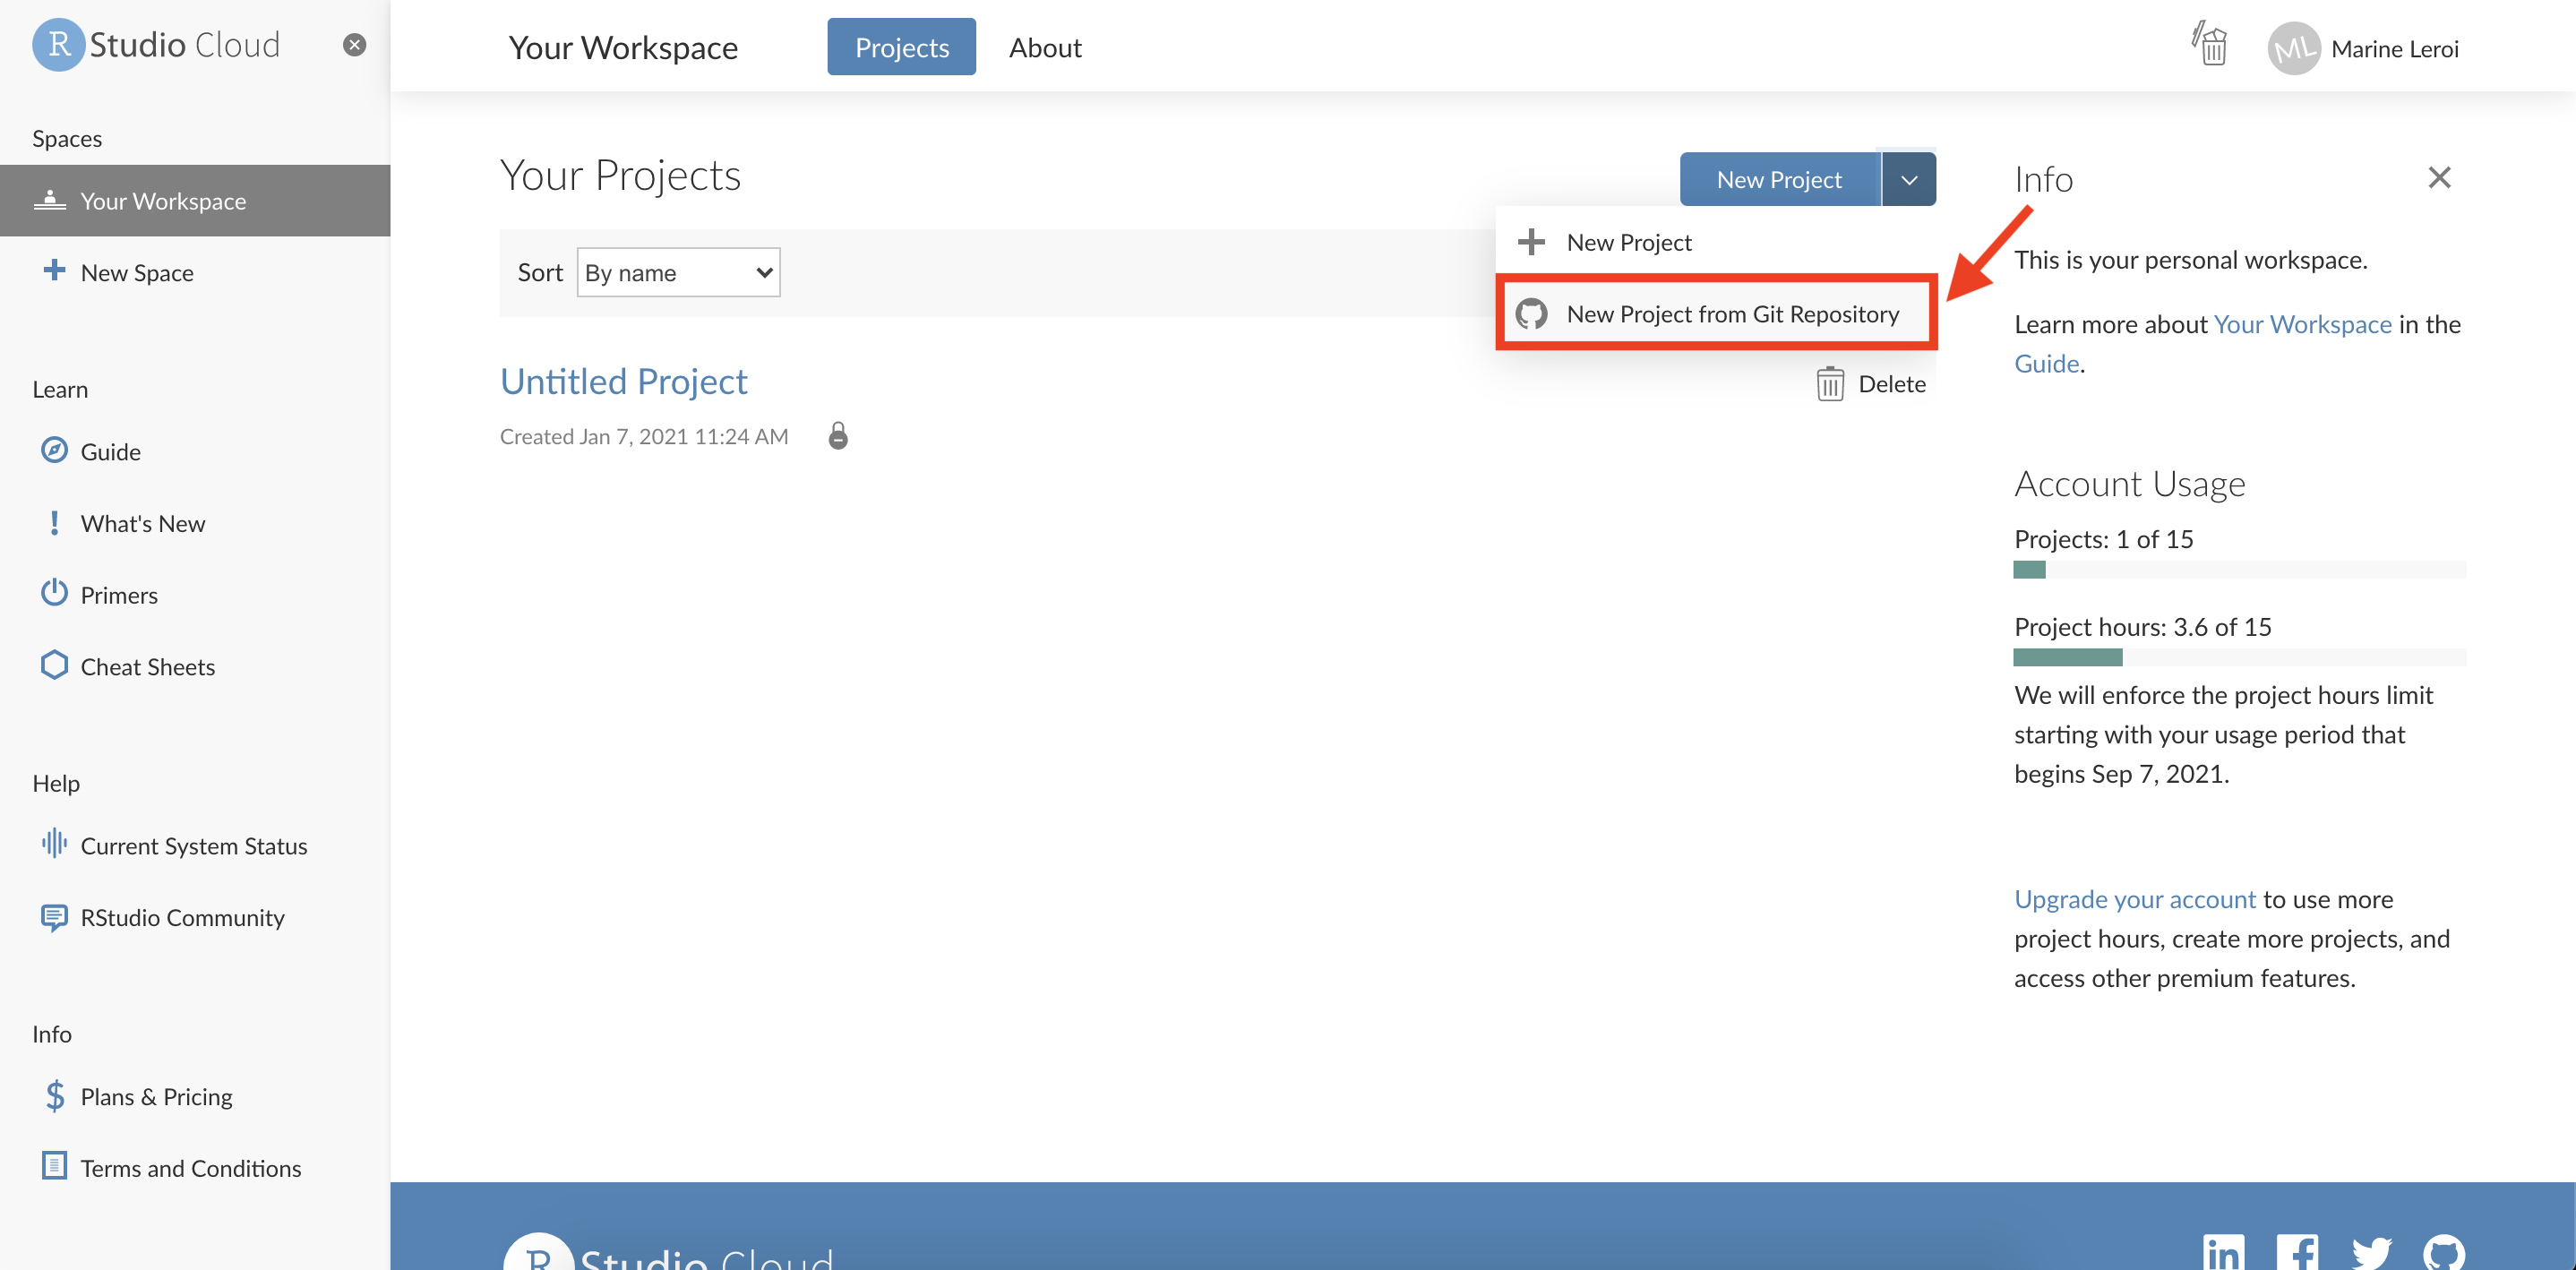
In “Repository URL”, paste the URL of your new GitHub repository. It will be something like this https://github.com/jennybc/myrepo.git.
Accept the default project directory name, e.g. myrepo, which coincides with the GitHub repo name.
Take charge of – or at least notice! – where the Project will be saved locally. A common rookie mistake is to have no idea where you are saving files or what your working directory is. Pay attention. Be intentional.
Click “Create Project”.
You should find yourself in a new local RStudio Project that represents the new test repo we just created on GitHub. This should download the README.md file from GitHub. Look in RStudio’s file browser pane for the README.md file.
3.3 Lower Camel Case
We recommend that all your files be labeled in a specific syntax, called lowerCamelCase. No space/symbol/accent should be inside file names. For example, the name of a document should look like this: reproducibleDocument1.Rmd. The first word is in lower case whereas all subsequent words must be attached, with the first letter in capital.
3.4 Pull, Commit, Push
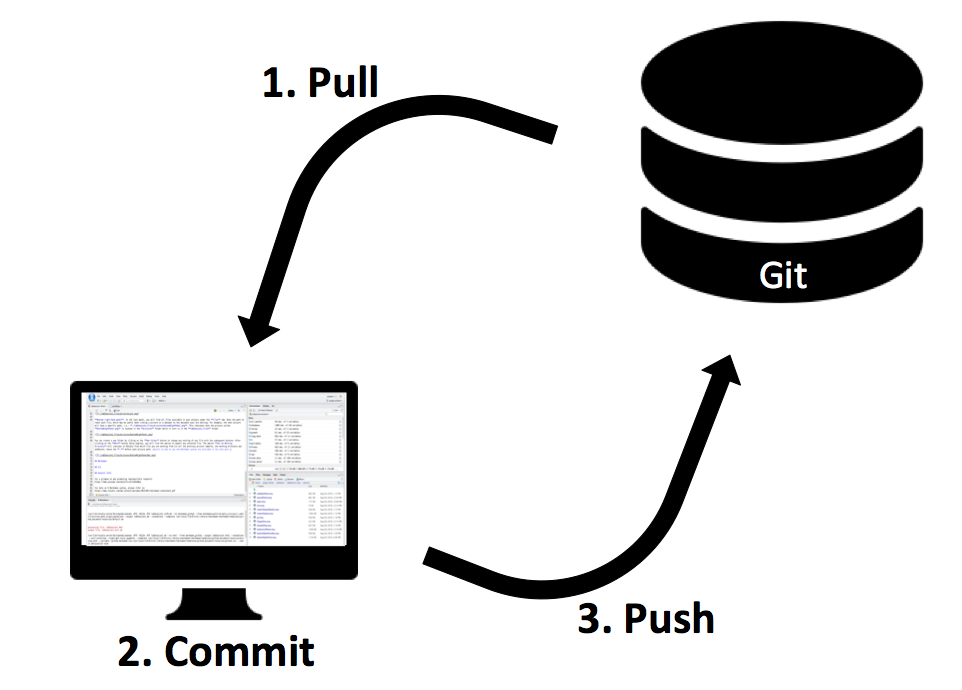
In order to synchronize your file with the instructors (which will be how every document for the semester will be saved and shared), three steps are required. First, select the Git tab in the top right-hand panel of the console.

- Pull means that you will import all files from the server which are not located in your local session;
- Commit means that you will make some changes to your files and that you want to mark them;
- Push means that you want to synchronize your local work with the server, hence add your contribution to the server.
When you log in your console, always click on Pull in order to get the latest version of your files. When you have added some modifications to your project and that you want to save them, click on Commit. You will be redirected to the following panel:
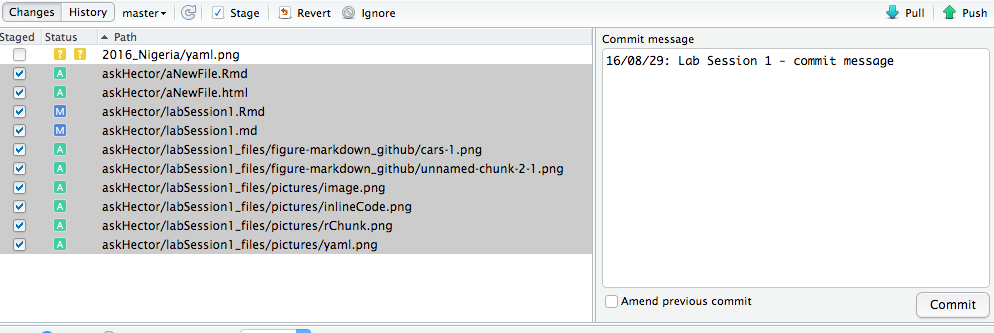
Select all files that you have created, deleted or modified and then click on the Stage button. You need to specify what kind of modification has been added in the commit message box. After clicking on Commit, your files will be marked. Now, click on Push in order to send all modifications to the server. That way, all your project will be synchronized online.
Remember: Pull > Commit > Push. This must become a reflex.
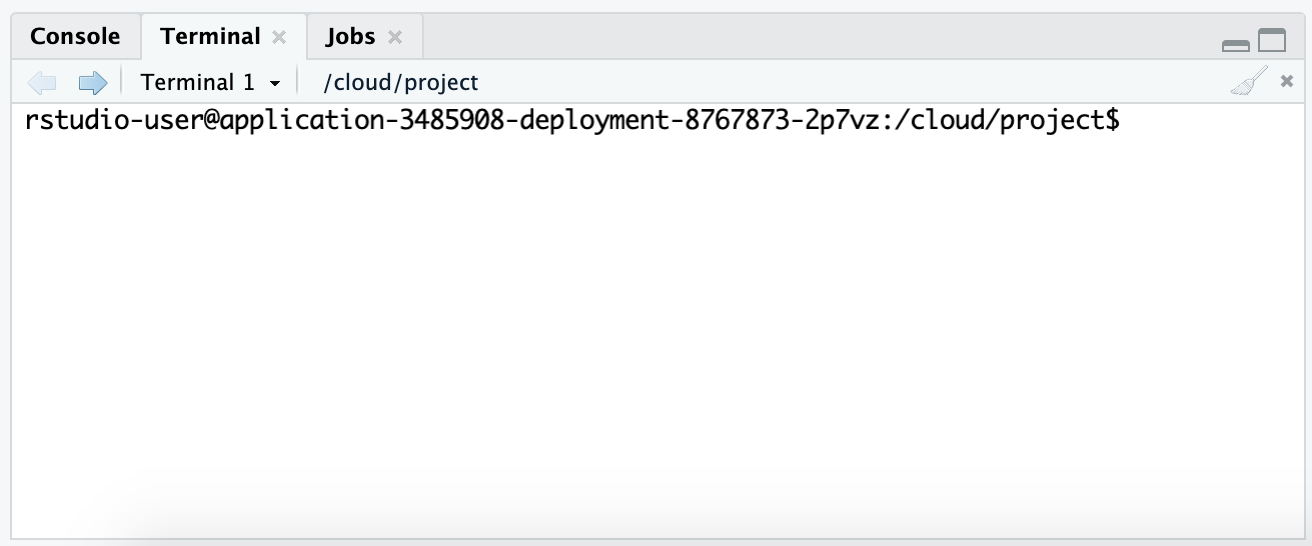
3.4.1 Git config
The first time you’ll want to commit > push, you’ll have to configure your email and user name.
In the terminal tab:
- after the
$sign, enter this line first (with your proper email address)
- and then this line (with your proper name)
You Git setup is done, you can now, commit > push your work!
TL;DR
- lowerCamelCase: specific syntax for your files’ name.
- Pull, Commit, Push:
- Pull: import files from the server
- Commit: mark your changes
- Push: add your changes to the server